


The hole in the hallway wall has been there for eight months. It started as a doorknob accident and survived two attempts with spackle that cracked, shrank, and fell out. Now there is a piece of tape over it that everyone is pretending is temporary. This guide ends the tape. Every drywall repair, from a nail hole to a fist-sized punch-through, follows the same core process. The only difference is which patch method you start with and how many coats of compound the size requires.
What You Need Before You Start
Most drywall repairs need some combination of the following:
- Lightweight joint compound (also called mud): The all-purpose option for most repairs. Pre-mixed tubs are easiest for beginners
- Putty knife or drywall knife: A 3-inch knife handles small holes; a 6-inch knife is better for medium patches; a 10-inch knife for large repairs
- Self-adhesive mesh patch: For holes roughly 1 to 6 inches across
- Fiberglass mesh tape: For cracks and seams on larger patches
- Fine-grit sandpaper or sanding sponge: 150 to 220 grit for finish sanding
- Primer: Essential before painting or the repair will show through as a dull spot
- Matching paint
- Utility knife: For cleaning and squaring up edges
Skip the pre-mixed spackle in the tube for anything larger than a nail hole. It shrinks as it dries, which is exactly why the previous repair fell out. Lightweight joint compound dries flatter and sands more cleanly.
Nail Holes and Small Dings (Under Half an Inch)
These are the fastest repairs in the house and require almost nothing.
- If a nail or screw is still in the wall, drive it slightly below the surface with a hammer rather than pulling it out. Pulling creates a bigger hole and tears the drywall paper
- Dip the tip of the putty knife into the compound and press a small amount into the hole, dragging the knife flat across the surface to fill it flush
- Let dry completely. Drywall compound changes color from dark gray to white as it dries. Do not sand wet compound
- Sand lightly with a fine sanding sponge until smooth
- Prime the spot before painting. Skipping primer causes the patch to appear as a flat, dull circle even under multiple coats of paint
Total time: ten minutes of work plus drying time. Total cost: under five dollars if you already have paint.
Medium Holes (Half an Inch to 6 Inches)
This covers doorknob dents, anchor pull-outs, and the kinds of holes that result from furniture moving day.
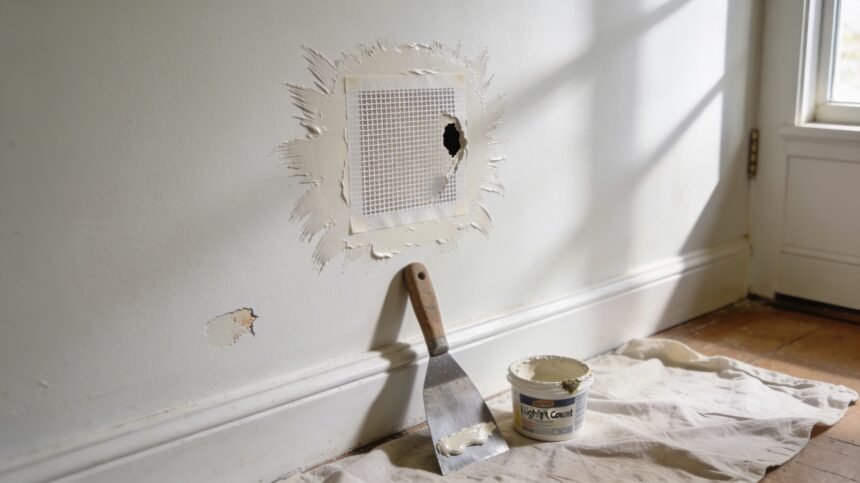
Step one: Clean the edges. Use a utility knife to remove any loose drywall paper or torn edges around the hole. The patch needs to adhere to a flat, stable surface.
Step two: Apply the mesh patch. Center a self-adhesive mesh patch over the hole and press it firmly to the wall. Make sure every edge of the hole is covered by at least an inch of mesh.
Step three: First coat. Using a 6-inch knife, spread lightweight joint compound over the entire mesh patch and feather the edges outward two to three inches past the patch in every direction. Keep this coat thin. Thick first coats crack as they dry.
Step four: Dry completely. Wait a minimum of four hours. In humid climates or during summer, wait overnight. Do not rush this step. A patch that feels dry on the surface may still be wet underneath.
Step five: Sand lightly. Use 150-grit sandpaper or a sanding sponge to knock down any ridges or high spots. Wipe the dust with a dry cloth.
Step six: Second coat. Apply a thinner second coat, feathering the edges four to six inches past the first coat. The goal of each successive coat is to blend the repair invisibly into the surrounding wall.
Step seven: Final sand. Once the second coat is fully dry, sand with 220-grit paper until the surface is completely smooth and flush. Run your hand across it in different directions. If you feel an edge or ridge, sand more.
Step eight: Prime and paint. Apply a thin coat of primer to the entire repaired area. Let it dry completely before painting. Match your wall paint and apply two coats if needed for a seamless finish.
Large Holes (6 Inches and Bigger)
A large hole needs something rigid behind it to hold the patch. A mesh sticker alone will flex and crack.
The backing strip method is the most beginner-friendly approach for holes that are too large for a mesh patch but do not span a full wall panel:
- Use a utility knife or drywall saw to cut the damaged area into a clean square or rectangle. Straight edges make the patch easier to fit
- Cut a 1×3 or 1×4 board slightly longer than the height of your cut-out opening
- Slide the board into the hole and hold it flat against the inside face of the drywall. Drive two screws through the existing wall on each side to pin the board in place. It acts as a backer
- Cut a piece of drywall to match the size of the opening exactly. Screw it into the backer board
- Apply self-adhesive mesh tape over all four seams between the patch and the existing wall
- Apply the first thin coat of joint compound over the tape, feathering two to three inches past the seams
- Repeat with two or three additional coats, feathering wider each time, up to eight to twelve inches past the seams for large repairs
- Sand, prime, and paint
The secret to an invisible large patch is the feathering. Each coat extends further than the last so the transition from patch to wall is gradual enough that the eye cannot detect where the repair ends.
Matching the Wall Texture
A smooth-walled finish just requires sanding until flat. Textured walls take one additional step:
- Orange peel texture: Roll thinned joint compound with a paint roller for a subtle bumpy finish. Practice on cardboard first to match the scale of the existing texture
- Knockdown texture: Apply thinned compound with a roller or spray, let it partially set for ten minutes, then lightly flatten the peaks with a wide knife held nearly flat
- Smooth walls: A final skim coat, a very thin layer of compound spread across the entire repaired area with a wide knife, fills any remaining texture variations before final sanding
The most common beginner mistake is applying the first coat too thick. A thin first coat dries flatter, sands easier, and requires fewer total coats than a thick one that cracks down the center as it shrinks.
Connecting the Repair to the Bigger Picture
Drywall repairs are among the home repairs you cannot afford to ignore because exposed drywall absorbs moisture, and moisture in drywall leads to mold. A patched wall is also the first step in any interior refresh since paint applied over unpatched surfaces shows every imperfection under certain lighting.
Pairing a drywall repair session with a spring home refresh under fifty dollars or a weekend fix for builder-grade eyesores makes the effort go further since you are already set up with tools and drop cloths. The home maintenance schedule by month keeps a drywall inspection in the seasonal rotation so holes get addressed before they grow.
A repair that took forty-five minutes and twelve dollars in supplies is a wall you can stop thinking about. That is what DIY repairs that actually save money look like when the job is done right.
For the tools and materials needed for this project, Amazon has everything you need delivered to your door.


Have you ever tried patching drywall yourself? Check out this guide for some great tips! #DIY #HomeImprovement #CozyCornerDaily