


The bedroom gets a ceiling fan and the electric bill gets quieter at the same time. That is the deal. The install takes ninety minutes and costs zero dollars in labor because the labor is yours. The hardest part is not the wiring, which is genuinely three wire connections. The hardest part is finding out whether the box in your ceiling was designed to hold something that spins and weighs forty pounds, and that takes about thirty seconds to check.
- Before You Touch Anything: The Junction Box Test
- What You Need for the Full Install
- Step One: Cut the Power and Confirm It Is Off
- Step Two: Remove the Old Fixture
- Step Three: Attach the Mounting Bracket
- Step Four: Hang the Motor
- Step Five: Connect the Wires
- Step Six: Close the Canopy and Attach the Blades
- Step Seven: Restore Power and Test
- Airflow Direction by Season
- The Payoff on the Electric Bill
Before You Touch Anything: The Junction Box Test
This is the step most people skip and the one that determines whether the install is safe. A standard light fixture junction box is rated to hold a stationary fixture. A ceiling fan is a moving, vibrating load that can weigh between twenty and seventy pounds depending on the model. The wrong box will loosen over months and eventually drop the fan.
Turn off the breaker to the room. Remove the existing light fixture. Look inside the electrical box in the ceiling. A fan-rated box will be metal and should have a marking on the interior stating it is rated for ceiling fan support, often 35 lbs or 70 lbs. If the box is plastic, or if you see no weight rating, it is not fan-rated and needs to be replaced before anything else happens.
Replacing a non-fan-rated box is a fifteen-minute job using an expandable fan brace:
- Remove the existing box by loosening the mounting screws and pulling it out of the ceiling hole
- Insert the expandable fan brace through the ceiling hole and position it between the two nearest ceiling joists
- Rotate the center tube by hand until the brace arms extend and the teeth bite firmly into both joists
- Attach the fan-rated metal junction box to the U-bolt on the brace, tighten the nuts, and feed the house wires through the box knockout
The brace and box kit costs approximately fifteen to twenty dollars at any hardware store and eliminates the safety concern entirely.
What You Need for the Full Install
- Ceiling fan with mounting hardware and all included components
- Non-contact voltage tester (non-negotiable, approximately $15)
- Wire nuts (usually included with the fan)
- Flathead and Phillips screwdrivers
- Needle-nose pliers
- Step ladder tall enough to work comfortably at the ceiling
- Electrical tape (optional but useful for securing wire nut connections)
Step One: Cut the Power and Confirm It Is Off
Go to the circuit breaker and turn off the breaker for the room. Do not rely on the wall switch alone. Come back to the ceiling box and use the non-contact voltage tester near the wires. The tester beeps or lights up when it detects live current. Test every wire in the box. If the tester stays silent on all of them, the power is confirmed off and you can proceed.
This step is not optional and is not something to do quickly. A ceiling fan installation on a live circuit is a serious shock risk. The thirty seconds it takes to test is not negotiable.
Step Two: Remove the Old Fixture
Unscrew the canopy of the existing light fixture and lower it to expose the wire connections inside the junction box. Note or photograph how the wires are connected before you disconnect anything. Unscrew the wire nuts and separate the connections. Remove the fixture mounting bracket from the box. The old fixture is now down.
At this point you should see three types of wires coming from the ceiling box: a black wire (hot), a white wire (neutral), and either a bare copper or green wire (ground). Some older homes may have two wires without a ground. If you see only two wires, the fan can still be installed but cannot be grounded, which is worth noting.
Step Three: Attach the Mounting Bracket
Every ceiling fan comes with its own mounting bracket. Attach it to the junction box now following the manufacturer’s instructions. Most brackets either bolt directly onto the box’s two mounting screws or clip onto them. Thread the house wires through the center hole of the bracket so they hang down ready for connection.
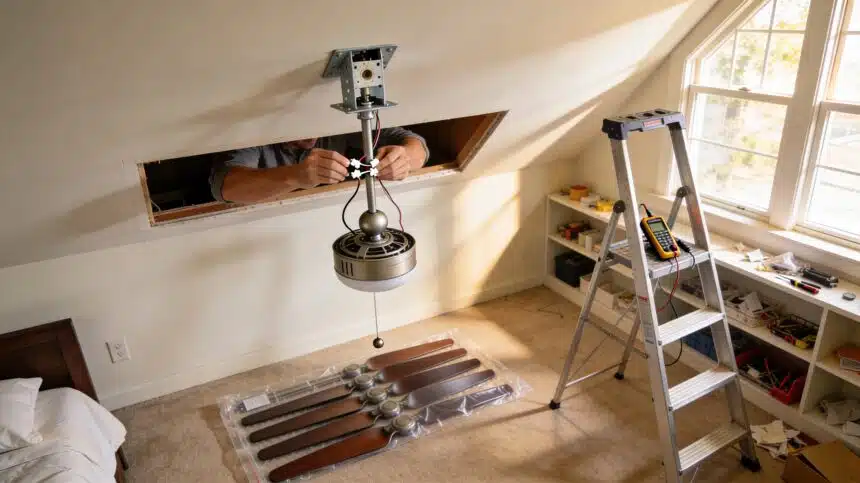
Step Four: Hang the Motor
Most ceiling fans use a ball-and-socket or hook mounting system. The downrod attaches to the motor housing and has a ball at the top that drops into the mounting bracket’s socket, or a hook that latches onto the bracket. Hang the motor on the bracket now so both hands are free for wiring. The motor will rest there securely while you work.
Step Five: Connect the Wires
This is the step that intimidates first-timers and is actually the most straightforward part of the job:
- Black to black: Connect the black house wire to the black fan wire using a wire nut. Twist clockwise until the nut is snug and give it a firm tug to confirm it will not pull apart
- White to white: Connect the white house wire to the white fan wire the same way
- Ground to ground: Connect the bare copper or green house wire to the green fan wire or to the green screw on the mounting bracket
If the fan has a separate blue wire, that wire controls the light kit independently from the fan motor. In a single-switch installation, connect the blue wire together with the black wires under the same wire nut. The switch will control both the fan and light together. In a two-switch installation, run the blue wire to the second switch’s circuit.
Wrap each wire nut connection with a single wrap of electrical tape to prevent loosening from the fan’s vibration. Push all the connected wires up into the junction box or canopy space, keeping grounds and neutrals to one side and the hot wires to the other.
Step Six: Close the Canopy and Attach the Blades
Secure the canopy cover over the mounting bracket according to the manufacturer’s instructions. Attach each blade to its blade bracket and then each blade bracket to the motor housing using the supplied screws. Snug each screw firmly but do not overtighten, which can warp the blade brackets and cause wobble.
Step Seven: Restore Power and Test
Turn the breaker back on. Test the fan on all speeds and test the light if the fan has one. Let it run on high for two minutes and observe from below. A small amount of movement during the first few seconds is normal as the blades find their balance. Persistent wobble that does not settle indicates one of three things: a blade bracket that is not fully tightened, a blade that is slightly warped from shipping, or an unbalanced blade set.
The balancing kit included with most fans, a small clip that attaches to the blade edge, resolves most wobble issues by adding weight to the lighter blade until the rotation smooths out.
Airflow Direction by Season
Most ceiling fans have a direction switch on the motor housing. In summer, set the fan to spin counterclockwise when viewed from below. This pushes air straight down and creates the wind-chill effect that lets you raise the thermostat two to four degrees without noticing. In winter, reverse to clockwise on low speed to pull cool air up and push the warm air that has collected at the ceiling back down along the walls.
Getting the summer direction wrong is the most common ceiling fan mistake, and it is exactly why thermostat mistakes cost money. A fan spinning the wrong direction in summer provides almost no cooling benefit and wastes the electricity running it.
The Payoff on the Electric Bill
A ceiling fan running at medium speed costs roughly two to three cents per hour to operate. An air conditioner costs approximately fifteen to forty cents per hour depending on the unit and your rate. Using ceiling fans to extend the comfort range of your thermostat setting is one of the most reliable ways to reduce the summer electric bill without reducing comfort, and the installation cost pays for itself within one cooling season in most climates.
Combined with the HVAC maintenance habits that lower bills and the AC tune-up checklist before summer, a ceiling fan in every main living space can contribute meaningfully to cutting household bills by several hundred dollars over the course of a year.
A ninety-minute install, no electrician bill, and the bedroom is cooler by next week. That is what DIY home repairs that actually save money looks like when the job is done right.
For the tools and materials needed for this project, Amazon has everything you need delivered to your door.


Have you ever replaced a light fixture with a fan? Check out this quick guide for tips! #DIY #HomeImprovement #CozyCornerDaily