


Peel-and-stick backsplash is trending because it’s one of the few DIY upgrades that gives a big visual payoff without needing a contractor, a saw, or emotional recovery time.
 1")
 3")
 5")
 7")
But it can also look… bad. Crooked rows. Gaps. Corners peeling in 2 weeks. We’re not doing that.
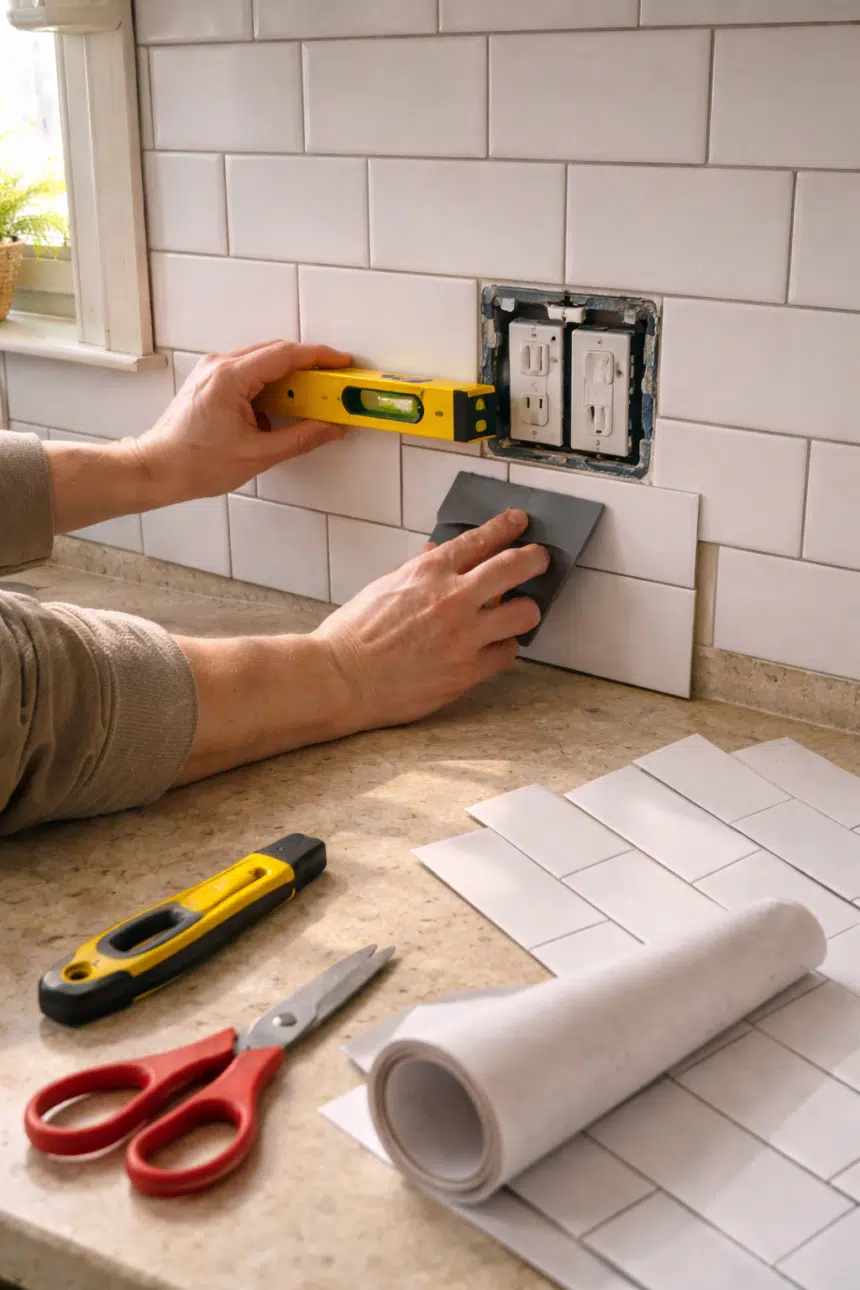
Before you start: the 2 things that decide success
- Your wall must be clean and dry. Grease is the enemy.
- Your first row must be level. Not “looks level.” Actually level.
Step-by-step installation (clean finish)
- Clean the wall with degreaser, then wipe with plain water.
- Mark a level guideline for your first row.
- Dry-fit a few tiles before peeling anything.
- Start in the most visible area (usually behind the stove).
- Press firmly from center outward to push out air.
- Use a smoothing tool to seal edges.
- Cut around outlets carefully with a sharp utility knife.
Pro tips that keep it from peeling later
- Don’t install right above a constantly steaming kettle area unless you seal well.
- Press edges again after 24 hours.
- If corners lift, it’s usually grease or not enough pressure.
If you’re on a winter home-fix kick, this pairs nicely with: the 15-minute draft test to stop heat loss.
FAQs
Q: Will it damage the wall when I remove it?
A: It depends on your paint and how long it’s been up. Heat it gently and peel slowly.
Q: Can I install over textured walls?
A: Not ideal. Smooth is best. Texture increases the chance of peeling.
Q: Can I install behind a stove?
A: Yes, but use heat-resistant product and keep it clean. Grease buildup is what kills adhesion.
Q: How do I avoid crooked lines?
A: Level your first row. Everything follows the first row.
For the tools and materials needed for this project, Amazon has everything you need delivered to your door.


Any success stories with peel-and-stick backsplashes? Would love to hear your experiences! Check the guide out! #DIY #HomeDecor #RenterFriendly #CozyCornerDaily
Have you tried peel-and-stick backsplashes before? Check out this guide for some great tips! #HomeImprovement #DIY #CozyCornerDaily