


You just finished laying tile in your bathroom or kitchen, and now you are staring at all those empty joints wondering how you are supposed to fill them without making a mess. Grouting tile sounds intimidating, but once you understand the process, it is actually one of the most satisfying parts of a tile project.
- What you will need
- Step 1: Make sure your tile is ready
- Step 2: Mix your grout
- Step 3: Apply the grout
- Step 4: Let the grout set slightly
- Step 5: Clean the tile surface
- Step 6: Let the grout cure
- Step 7: Seal the grout
- Common grouting mistakes to avoid
- Tips for a professional-looking grout job
- Grouting tile FAQs
The grout is what locks everything in place, fills the gaps, and gives your tile that finished, professional look. And the good news is, you can absolutely do this yourself in a couple of hours.
If you are working on a bathroom makeover and need more hands-on DIY tips, check out how to install a handheld shower head yourself for another beginner-friendly upgrade.
What you will need
Grouting tile does not require a lot of tools, but the few you need make a huge difference.
Grout. Make sure you have the right type for your project. Sanded grout is used for joints wider than 1/8 inch. Unsanded grout is for narrow joints. Follow the mixing instructions on the bag.
A grout float. This is a flat rubber tool with a handle that you use to spread and press grout into the tile joints. The QEP grout float is a solid beginner option with a non-stick rubber pad.
A large grout sponge. Not a regular kitchen sponge. You need a big cellulose grout sponge with rounded edges that will not pull grout out of the joints.
Two buckets. One for mixing grout if you are using powdered grout, and one with clean water for rinsing your sponge.
A margin trowel or putty knife for scooping grout out of the bucket.
Grout sealer to apply after the grout dries, which protects it from stains and moisture.
Knee pads if you are grouting a floor. Your knees will thank you.
And if you are tackling this as part of a bigger bathroom refresh, grout cleaning hack that saved $500 on renovation shows how clean grout can transform a tired space.
Step 1: Make sure your tile is ready
Before you start grouting, your tile needs to be fully set. If you just laid the tile, check the thinset or adhesive instructions for curing time. Most thinset needs at least 24 hours to cure before grouting.
Remove all tile spacers from the joints. If you leave them in, they will get stuck under the grout and cause problems.
Clean the tile surface and joints. Use a damp cloth or vacuum to remove dust, debris, and any dried thinset that squeezed up between tiles. The joints need to be clean and dry before you apply grout.
Step 2: Mix your grout
If you bought pre-mixed grout, you can skip this step. If you are using powdered grout, follow the instructions on the bag carefully.
Pour clean water into your bucket first, then slowly add the grout powder while mixing with a margin trowel or drill mixer. You want a thick peanut butter consistency that holds together but is not too dry or too watery.
Let the grout sit for about 10 minutes after mixing. This is called slaking, and it allows the chemicals to activate. Then give it one more quick stir before using.
Only mix as much grout as you can use in about 30 minutes. Grout starts to harden fast once it is mixed.
If you are working on a kitchen backsplash project, peel and stick weekend makeovers covers other quick DIY upgrades that pair well with tile work.
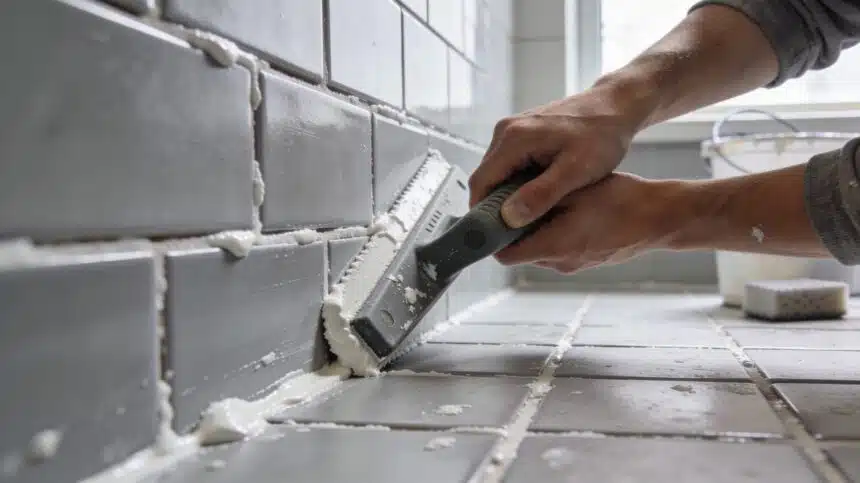
Step 3: Apply the grout
Scoop a generous amount of grout onto your grout float. Hold the float at a 45-degree angle to the tile surface and spread the grout diagonally across the tiles, pressing firmly into the joints.
Work in small sections, about 3 feet by 3 feet at a time. You want to completely fill the joints all the way to the bottom. Press hard and make multiple passes to pack the grout in.
Once the joints are filled, hold the grout float at a steep angle, almost 90 degrees, and scrape off the excess grout from the tile surface. Move diagonally across the tiles, not parallel to the grout lines. If you scrape parallel, you risk scooping grout back out of the joints you just filled.
Keep working section by section until all the joints are filled. Do not worry about cleaning the tile perfectly yet. Focus on getting the grout into the joints first.
And if you are doing multiple home improvement projects at once, the 30-day home reset challenge helps you stay organized and on track.
Step 4: Let the grout set slightly
After you finish applying grout to a section, wait about 10 to 20 minutes before cleaning. You want the grout to firm up just enough so it does not get pulled out of the joints when you wipe, but not so long that it hardens completely and becomes impossible to clean.
The grout should feel firm to the touch but not rock hard. If you wait too long, cleaning becomes much harder.
Step 5: Clean the tile surface
Fill your bucket with clean water. Dip your grout sponge in the water and wring it out until it is damp, not dripping wet. Too much water will weaken the grout and pull it out of the joints.
Wipe the tile surface in a circular motion to remove the grout haze. Rinse your sponge frequently in clean water and wring it out well each time.
After the first pass, switch to straight, diagonal strokes with a clean, damp sponge. Wipe gently so you do not disturb the grout lines.
Change your bucket water often. Dirty water just spreads grout residue around instead of removing it.
You will probably need to go over the tiles multiple times as a haze keeps reappearing. That is normal. Keep wiping with a clean, damp sponge until the tiles are clear.
If you are working on your bathroom and dealing with moisture issues in general, bathroom fan not removing moisture fix covers another common problem that affects tile areas.
Step 6: Let the grout cure
After cleaning, let the grout cure for at least 24 to 72 hours before walking on it or getting it wet. Check your grout package for specific curing times.
During this time, keep the area dry and avoid heavy traffic. The grout is still hardening and needs time to reach full strength.
You might notice a light grout haze reappearing as the grout dries. Once the grout is fully cured, you can buff it off with a clean, dry cloth.
Step 7: Seal the grout
After the grout has fully cured (usually 3 to 7 days), apply a grout sealer to protect it from stains, moisture, and mildew. This step is especially important in bathrooms and kitchens.
Use a small brush or applicator bottle to apply the sealer directly to the grout lines. Avoid getting sealer on the tile surface, or wipe it off immediately.
Let the sealer dry according to the product instructions, then apply a second coat for maximum protection.
Reseal your grout every 1 to 2 years to keep it looking good and prevent staining.
And if you are trying to keep your whole home looking fresh without spending a fortune, how we saved $400 a month with 5 simple changes covers other practical money-saving tips.
Common grouting mistakes to avoid
Do not use too much water when cleaning. Wet sponges weaken the grout and leave it chalky and crumbly. Always wring out your sponge well.
Do not wait too long to clean. If the grout hardens on the tile surface, it becomes nearly impossible to remove without damaging the tile.
Do not skip sealing. Unsealed grout absorbs stains, dirt, and moisture, which leads to discoloration and mildew growth.
Do not walk on freshly grouted tile. Even if it looks dry, the grout needs time to cure fully. Walking on it too soon can crack or dislodge the grout.
And if you are slowly building your DIY skills and want more beginner-friendly projects, simple home repairs every parent should learn walks through other confidence-building fixes.
Tips for a professional-looking grout job
Work in small sections. Do not try to grout an entire floor at once. You will not be able to clean it before it hardens.
Use consistent pressure when applying grout. This ensures the joints are fully packed and there are no air pockets.
Keep your tools clean. Rinse your grout float and sponge often so dried grout does not scratch your tiles.
Grout walls before floors. If you are grouting both, start with the walls so you do not step on freshly grouted floors while working.
If you are tackling a full bathroom remodel and need more step-by-step help, fixing builder-grade eyesores on a weekend covers other quick upgrades.
Grouting tile FAQs
How long does it take to grout tile?
A small bathroom or kitchen backsplash takes about 2 to 3 hours, including cleaning. Larger floor projects can take 4 to 6 hours depending on the size.
Can I grout tile the same day I lay it?
No. The thinset or adhesive needs at least 24 hours to cure before you grout. Check your product instructions for exact curing times.
What is the difference between sanded and unsanded grout?
Sanded grout is used for joints wider than 1/8 inch because the sand helps prevent shrinking and cracking. Unsanded grout is for narrow joints and polished tiles where sand might scratch the surface.
How do I fix grout that is cracking or crumbling?
Grout cracks when too much water was used during application or cleaning, or if the tile is moving. You will need to remove the damaged grout and re-grout those joints.
Grouting tile is one of those projects that looks harder than it is. Once you get the hang of using the grout float and sponge, it moves quickly and the results are so satisfying. Keep a good grout float, grout sponge, and sealer in your toolkit, and you can finish any tile project like a pro.


