


Last year I paid a handyman $85 to come to my house and tighten three screws on a cabinet door. Eighty-five dollars. For three screws. That took him maybe two minutes.
- The Basic Tool Kit You Actually Need
- Repair #1: Unclogging a Drain
- Repair #2: Fixing a Squeaky Door
- Repair #3: Patching Holes in Drywall
- Repair #4: Replacing an Outlet Cover
- Repair #5: Fixing a Running Toilet
- Repair #6: Tightening Loose Cabinet Hardware
- Repair #7: Changing Air Filters
- Repair #8: Unclogging a Garbage Disposal
- Repair #9: Sealing Gaps and Cracks
- Repair #10: Testing and Replacing Batteries in Smoke Detectors
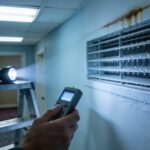
- Repair #11: Checking and Testing Outlets
- Repair #12: Fixing Stuck Windows
- When To Call a Professional
- The Tools I Wish I’d Bought Sooner
- Teaching Kids Basic Repairs
- The Confidence This Builds
I felt like an idiot. Not because I didn’t know how to do it, I could have figured it out, but because it never occurred to me that I could just do it myself. I’d been conditioned to think that home repairs required special knowledge or tools or skills that I didn’t have.
Turns out most small home repairs are actually pretty simple. You don’t need to be handy. You just need basic tools and the willingness to try. These are the repairs I learned to do myself and they’ve saved us probably a thousand dollars over the past year.
The Basic Tool Kit You Actually Need
Before you can fix anything, you need tools. Not a garage full of equipment, just a basic toolkit that covers most common repairs.
I bought a basic tool set that came with everything in one case. The CARTMAN 168-piece set has hammers, screwdrivers, pliers, wrenches, measuring tape, level, all the basics. It’s not professional-grade quality but for home repairs it works perfectly fine.
Having everything in one case means I know where my tools are. Before I bought this, I’d have a screwdriver in the kitchen, pliers in the garage, and nothing where I actually needed it when something broke.
The other tools I use constantly are a drain snake for unclogging drains, WD-40 for squeaky doors and stuck things, and spackle for patching holes in walls.
Those items plus the basic tool set cover probably 90% of small home repairs.
Repair #1: Unclogging a Drain
This is the repair I do most often because we have long hair in this house and drains clog constantly. I used to call a plumber every time. Plumbers charge minimum $100 to come out, usually more.
Now I just use a drain snake. The FlexiSnake Drain Weasel is this thin flexible plastic stick with little hooks on it. You shove it down the drain, twist it around, pull it back up, and it brings all the hair and gunk with it. It’s disgusting but it works.
For bathroom sink drains, you can usually just unscrew the stopper and pull out the hair that’s caught there. I do this about once a month as maintenance so it doesn’t get bad enough to fully clog.
For tougher clogs that the snake doesn’t fix, I use a plunger. Not the toilet plunger, a flat sink plunger. You cover the drain, fill the sink with a few inches of water, and plunge vigorously. This usually breaks up whatever’s blocking the pipe.
If that doesn’t work, then I call a plumber. But probably 95% of our drain clogs I can fix myself in five minutes.
Repair #2: Fixing a Squeaky Door
Squeaky doors were driving me insane. Every time someone opened the bedroom doors at night it would wake me up. I was ready to replace the doors until I learned you can fix squeaky hinges in about 30 seconds.
Spray WD-40 on the hinges. That’s it. Open and close the door a few times to work the lubricant in. Squeak gone.
If you don’t have WD-40, cooking oil works too. It’s messier but it does the same thing. Just don’t use too much or it’ll drip on your floor.
Some people say you should use silicone spray instead of WD-40 because it lasts longer. That’s probably true. But I have WD-40 and it works, so I use that.
Repair #3: Patching Holes in Drywall
We have kids. Kids put holes in walls. Doorknobs hit walls. Picture hangers leave holes. Our walls were full of little holes and some not-so-little holes.
For small holes like nail holes, you just need spackle and a putty knife. Squeeze some spackle into the hole, smooth it with the putty knife, let it dry, sand it lightly if needed, done. You can paint over it if you want it to match perfectly, but honestly for small holes I usually don’t bother.
For bigger holes, you need a drywall patch kit. These are self-adhesive mesh patches that stick over the hole. You stick the patch on, spread spackle over it, smooth it out, let it dry, sand it, done. It sounds complicated but it’s actually pretty straightforward.
My husband once put his elbow through the wall (don’t ask). I patched that hole myself with a patch kit and spackle. It’s not perfectly invisible if you look really closely, but it’s way better than a gaping hole and it cost me about $5 instead of hiring someone.
Repair #4: Replacing an Outlet Cover
Outlet covers crack or get paint splattered on them or just look gross after a while. I used to ignore this because I thought dealing with electrical stuff was dangerous.
Replacing an outlet cover is not dangerous. You’re not touching any wiring. You’re just unscrewing the cover plate and screwing on a new one.
Turn off the power to that outlet at the breaker box if you want to be extra safe, but honestly you don’t even need to for this. Unscrew the one screw in the middle of the cover plate. Take off the old cover. Put on the new cover. Screw it back in. Done.
New outlet covers cost like 50 cents each at the hardware store. This is the easiest way to make your house look cleaner and more updated with minimal effort.
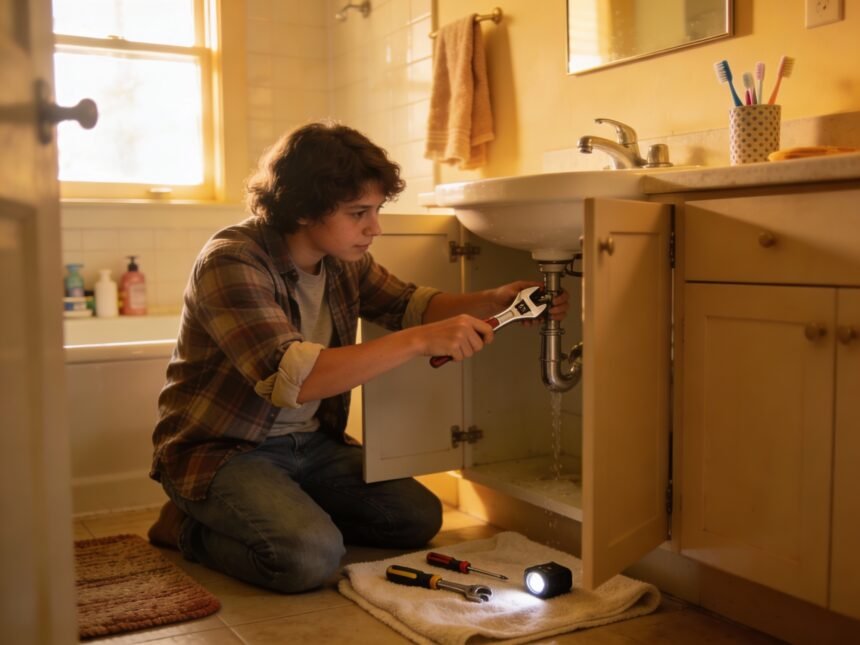
Repair #5: Fixing a Running Toilet
A toilet that runs constantly is annoying and it wastes water. We had one that ran all the time and our water bill was insane.
I watched a YouTube video and learned that usually a running toilet is caused by a bad flapper. The flapper is this rubber piece inside the tank that seals the hole at the bottom. When it gets old and doesn’t seal properly anymore, water leaks through and the tank keeps refilling.
Replacing a flapper takes maybe 10 minutes and costs about $5. Turn off the water to the toilet (there’s a valve behind the toilet near the floor). Flush the toilet to empty the tank. Unhook the old flapper, hook on the new flapper, turn the water back on. Done.
I called a plumber for this repair the first time it happened and he charged me $120. Now I just buy flappers in bulk and replace them myself whenever needed.
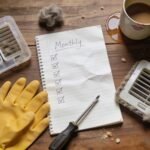
Repair #6: Tightening Loose Cabinet Hardware
Cabinet doors get loose over time. The screws work themselves out and the door hangs crooked or falls off completely. This looks terrible and it’s so easy to fix.
Open the cabinet. You’ll see the screws that attach the hinge to the cabinet frame. Tighten them with a screwdriver. That’s it.
If the screws are stripped and won’t tighten anymore, you can put a toothpick or wooden matchstick in the hole with the screw and that gives it something to grip. Or you can buy slightly longer screws.
This is the repair I paid $85 for someone else to do. I will never stop being annoyed at myself for that.
Repair #7: Changing Air Filters
This isn’t exactly a repair, but it’s maintenance that prevents expensive repairs later. Your HVAC system has air filters that need to be changed regularly. If you don’t change them, your system works harder, uses more energy, breaks down faster.
Find where your air return vents are. Pop off the vent cover. Pull out the old filter. Slide in the new filter (there’s an arrow on the side showing which direction to install it). Put the vent cover back on.
I do this every three months. I set a reminder on my phone so I don’t forget. Filters cost maybe $5 to $15 depending on what kind you buy. Way cheaper than fixing a broken HVAC system.
Repair #8: Unclogging a Garbage Disposal
Our garbage disposal stopped working one day. It would hum but not actually spin. I thought it was broken and we’d need a new one.
Turns out it was just jammed. There’s usually a reset button on the bottom of the disposal unit. Push that. If it still doesn’t work, there’s something stuck in the blades.
Turn off the power to the disposal at the breaker box. Use tongs or pliers to reach in and pull out whatever’s stuck. DO NOT put your hand in there even with the power off. Use tools.
If it’s really stuck, there’s usually a hex wrench that comes with the disposal (or you can buy one) that fits in a hole on the bottom of the unit. You turn that to manually rotate the blades and free whatever’s stuck.
Once it’s unstuck, turn the power back on, push the reset button, and it should work again.
Repair #9: Sealing Gaps and Cracks
Gaps around windows, doors, bathtubs, sinks, wherever, let in drafts and moisture. They also let bugs in, which is unacceptable.
You seal these with caulk. Get a caulk gun and a tube of caulk (get silicone caulk for bathrooms and kitchens, it’s waterproof).
Cut the tip off the caulk tube at a 45-degree angle. Load it in the caulk gun. Squeeze the trigger while running the tip along the gap you’re sealing. Smooth the bead of caulk with your finger or a wet paper towel. Done.
My first attempts at caulking were messy. It takes practice to get a smooth line. But even messy caulk is better than gaps.
I sealed all the gaps around our bathtub and the mildew problem we were having basically disappeared. I sealed gaps around our front door and our heating bill went down because we were losing less heat.
Repair #10: Testing and Replacing Batteries in Smoke Detectors
Smoke detectors beep when the battery is dying. That beep always seems to start at 2am. Instead of taking the battery out and never replacing it (which is dangerous and also illegal in many places), just replace the battery.
Most smoke detectors twist off the ceiling mount. Twist it off, take out the old battery, put in a new 9-volt battery, twist it back on. Test it by pushing the test button.
I replace all the batteries in our smoke detectors once a year whether they’re beeping or not. I do it when we change clocks for daylight saving time so I remember.
If your smoke detector is more than 10 years old, replace the whole unit. They don’t last forever and it’s not worth the risk.
Repair #11: Checking and Testing Outlets
If an outlet stops working, before you call an electrician, check the breaker box. Sometimes a breaker trips and all you need to do is flip it back on.
Find your breaker box. Look for any breakers that are flipped to the off position or sitting in the middle position. Flip them fully off, then back on. This resets them.
If that doesn’t fix it, the outlet might be wired to a GFCI outlet somewhere else in the house. GFCI outlets have test and reset buttons. They’re usually in bathrooms and kitchens. Find them and push the reset button.
If the outlet still doesn’t work after those steps, then yeah, you probably need an electrician. But a lot of times it’s just a tripped breaker and that’s a free fix you can do yourself in 30 seconds.
I also bought an outlet tester to check if outlets are working properly and wired correctly. You just plug it in and little lights tell you if there’s a problem. This is helpful if you’re in an older house and you’re not sure if the wiring is safe.
Repair #12: Fixing Stuck Windows
Our bedroom windows were painted shut when we moved in. I thought we’d have to get them professionally fixed or just live with windows that didn’t open.
Turns out you can fix this yourself. Run a utility knife along the edge where the window meets the frame to cut through the paint. Then use a putty knife to gently pry the window open. Work your way around all the edges.
Once it’s open, sand down any rough spots and repaint if needed. The window should open and close freely after that.
For windows that are hard to open because they’re swollen from humidity, you might need to sand down the edges a bit. For windows that stick because the tracks are dirty, clean the tracks with a vacuum and then spray with silicone lubricant.
When To Call a Professional
I do a lot of small repairs myself now, but there are things I won’t touch. Anything involving major electrical work, I call an electrician. Anything involving gas lines, I call a professional. Anything structural, I call someone who knows what they’re doing.
The guideline I use is: If I’m not confident I can do it safely, or if messing it up would cause expensive damage, I call someone. But for small stuff where the worst case scenario is I don’t fix it and I have to call someone anyway, I try it myself first.
YouTube is your friend here. You can find a video tutorial for almost any home repair. I watch at least two or three videos before attempting anything so I know what I’m getting into.
The Tools I Wish I’d Bought Sooner
Besides the basic tool set, the things I use most often are a multi-tool or utility knife for opening packages and cutting things, a stud finder for hanging heavy things safely, and duct tape for temporary fixes.
The stud finder is crucial if you’re hanging anything heavy like shelves or TVs. You need to screw into studs or use appropriate anchors or things will rip out of the wall. The stud finder locates the studs behind the drywall so you know where to drill.
Duct tape fixes everything temporarily until you can fix it properly. Or sometimes the duct tape becomes the permanent fix. I’m not proud of that but it’s true.
Teaching Kids Basic Repairs
My kids watch me do these repairs now and they’re learning. My older daughter knows how to tighten screws and use a screwdriver. She helps me patch holes in the wall. She understands that when something breaks, we can often fix it ourselves.
This is important life stuff that schools don’t teach. I want them to grow up knowing they can handle basic household problems without calling someone for every little thing.
Plus, teaching them gives me helpers. When I’m fixing something and I need someone to hold the flashlight or hand me tools, they can do that. It makes the work go faster.
The Confidence This Builds
Learning to do these repairs gave me so much confidence. I’m not helpless anymore. When something breaks, my first thought isn’t “who do I need to call?” It’s “can I fix this myself?”
Most of the time, the answer is yes. And even when the answer is no, I at least tried and I learned something.
I’ve saved us a ton of money by not calling professionals for every small issue. But more than the money, I like the feeling of being capable. Of knowing my house and how things work and being able to take care of problems myself.
If you’ve never done any home repairs before, start with something small and low-stakes. Tighten some cabinet screws. Unclog a drain. Change an air filter. Build your confidence with easy wins before you tackle anything more complicated.
You don’t need to become a general contractor. You just need to learn enough to handle the common problems that come up in every home. This is totally doable and it’s worth it.
If you’re working on getting your whole house more organized and functional, check out the home organization system that actually stuck. Knowing where everything is makes maintenance and repairs way easier.
Amazon Disclosure:
As an Amazon Associate, I earn from qualifying purchases. This means if you click on an Amazon link and make a purchase, I may receive a small commission at no extra cost to you. I only recommend products I actually use and believe will help you.


What home repair do you find easiest to do? Let’s learn more together! #HomeRepairs #ParentingTips #DIY #CozyCornerDaily